Build a Raspberry Pi NAS they said. It will be easy...
* Nobody said that, I had the idea myself.
First off, what were the goals? The NAS should be:
- redundant and protect from a drive failure.
- cheap.
- an easy to use solution for my onsite backup.
- powered by a single USB-C Cable.
Just connect two SSDs via USB to a Raspberry Pi 4 and run the NAS. What could go wrong?
Yeah, no:
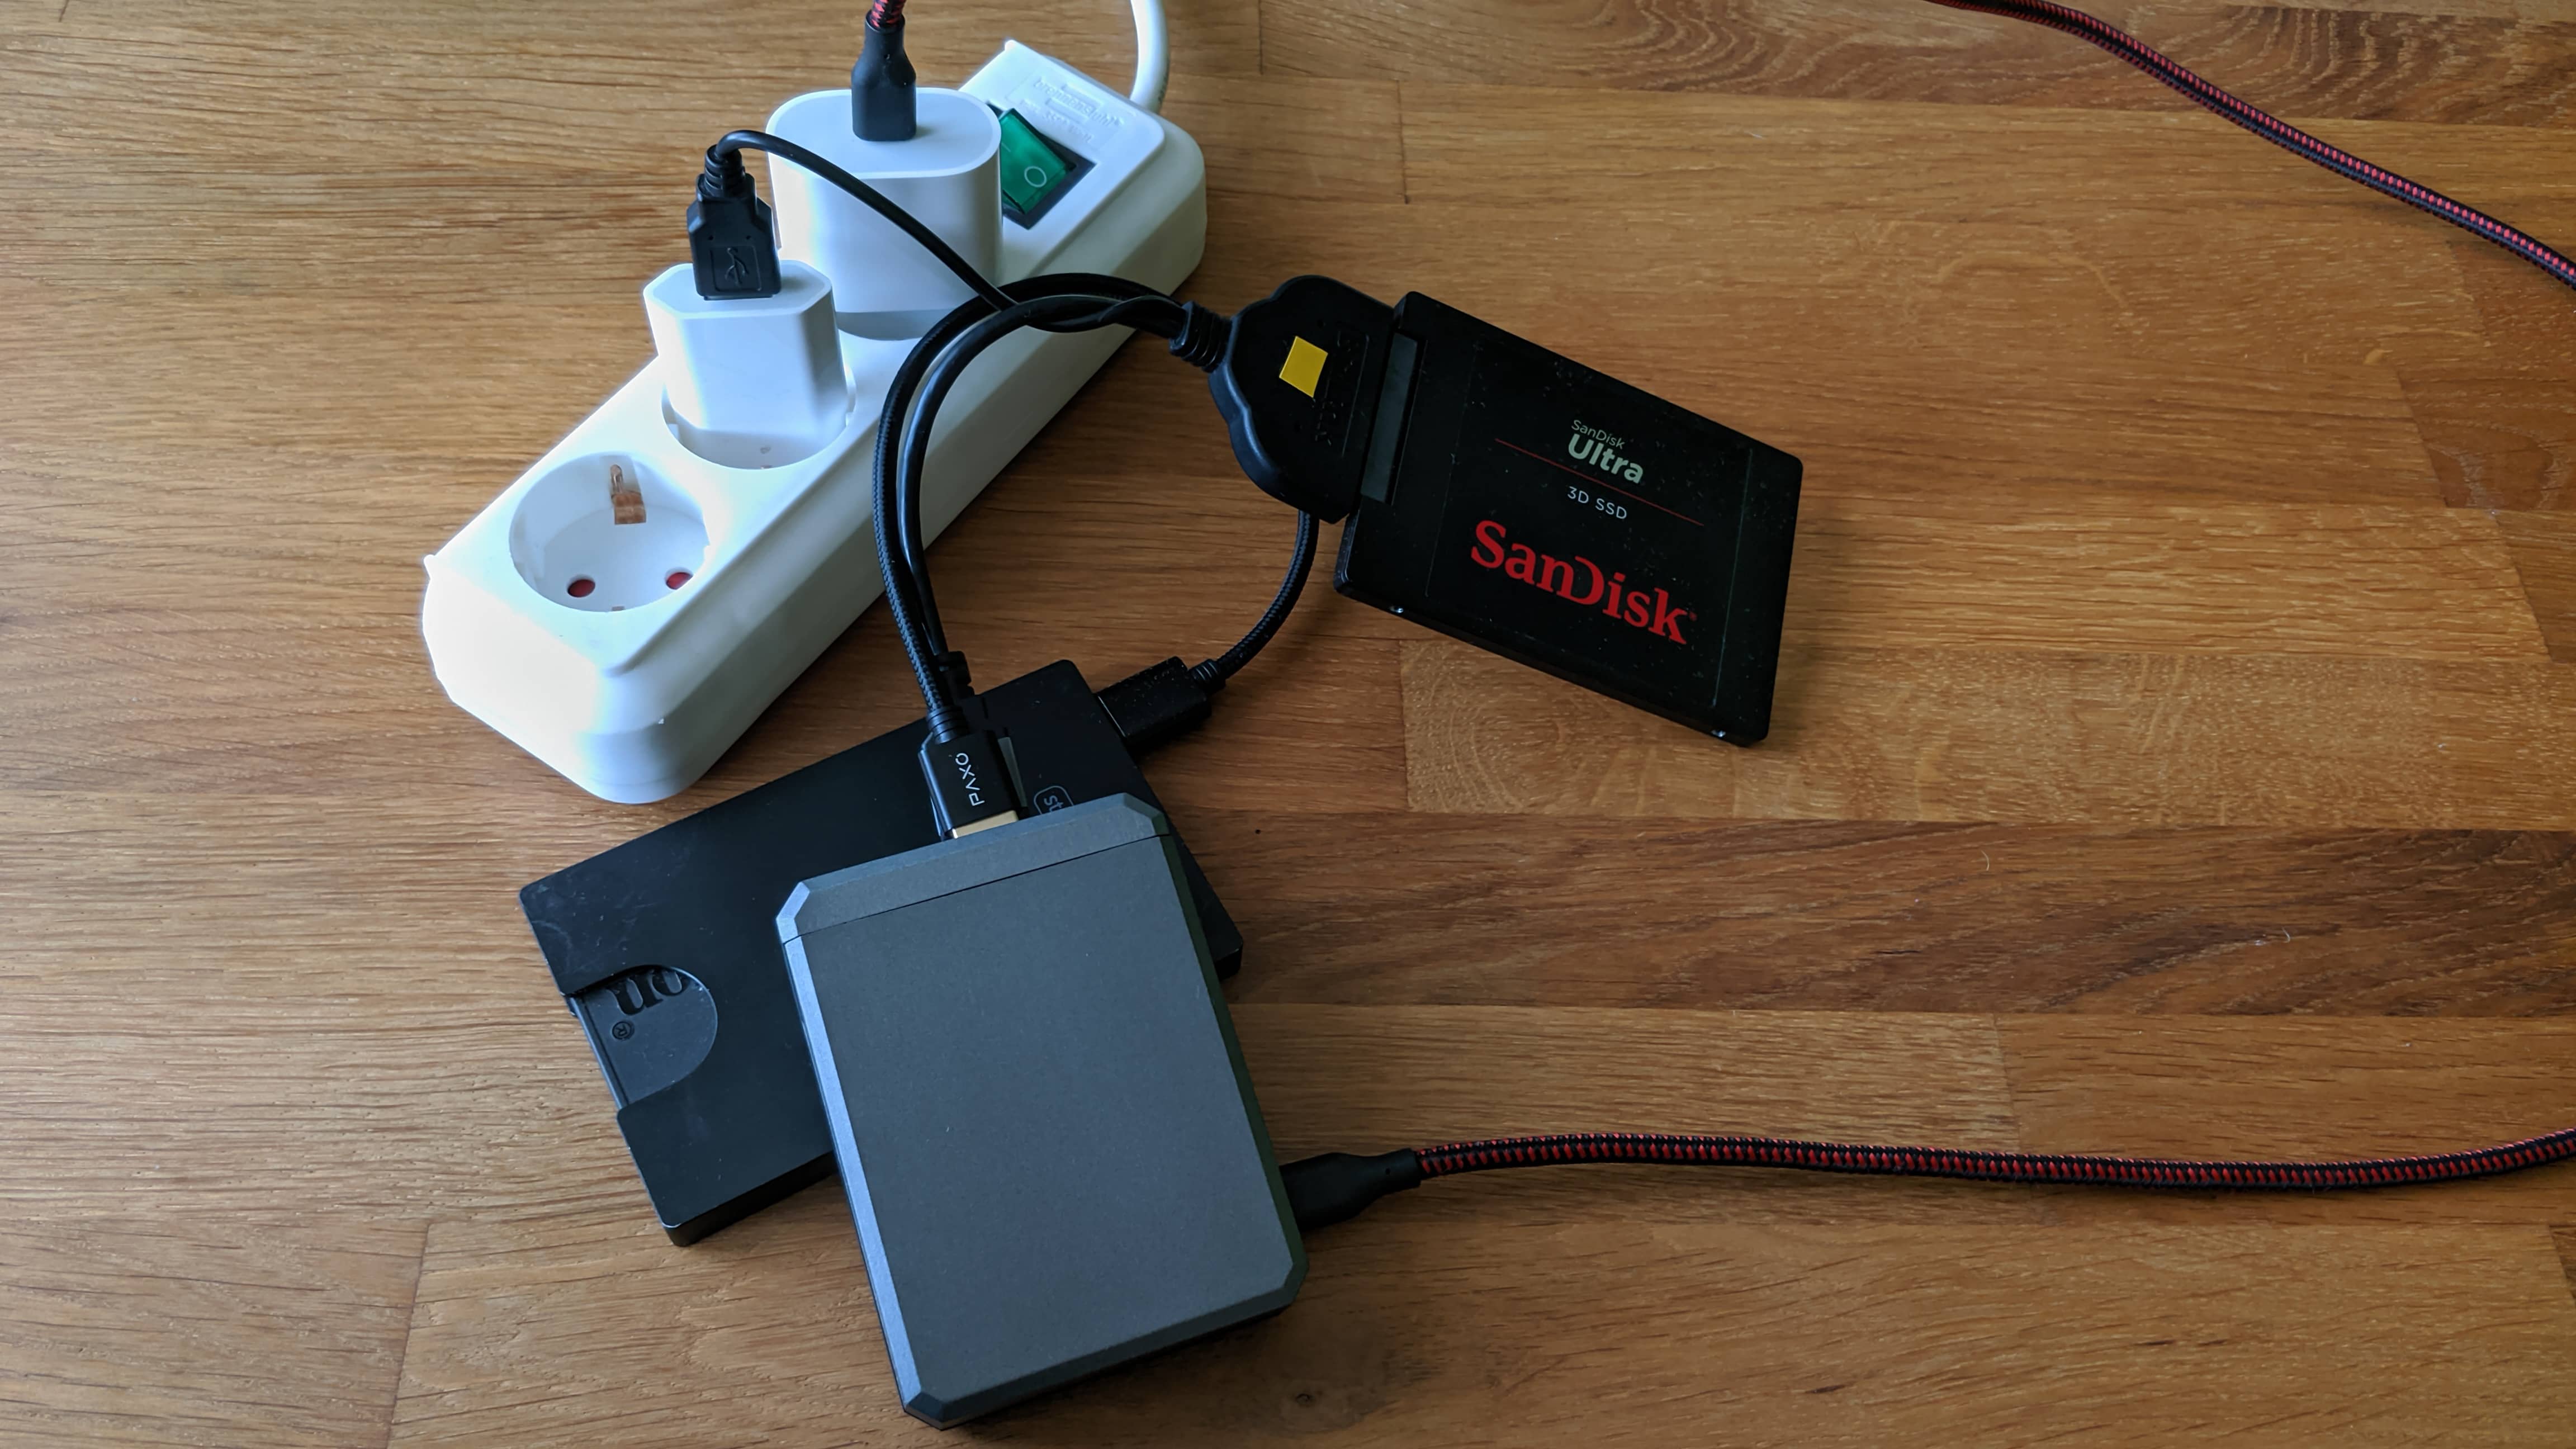
Why not power it through an external USB-Hub?
Yeah, look at the picture above: That is ugly.
Why SSDs? SSDs are not cheap.
SSDs have two main advantages. First off they are fast and more importantly they don’t consume much power.
The Raspberry Pi 4 has a power limit of 1.2 A on the USB Ports. So a two traditional hard drive would drain too much power and the Pi won’t boot. SSDs don’t consume so much power and so the Pi 4 should “theoretical” have no problem.
Turns out two SSDs drain still too much power.
In the process of fixing this problem I’ve tried finding SSDs which draw less power.
Models I’ve tested:
- SanDisk Ultra 3D SSD
- Kingston A400
- Samsung 870 Evo
- Crucial MX500
I’ve had problems with all of them, sometimes the SSD randomly disconnected and sometimes I’ve got very slow IO.
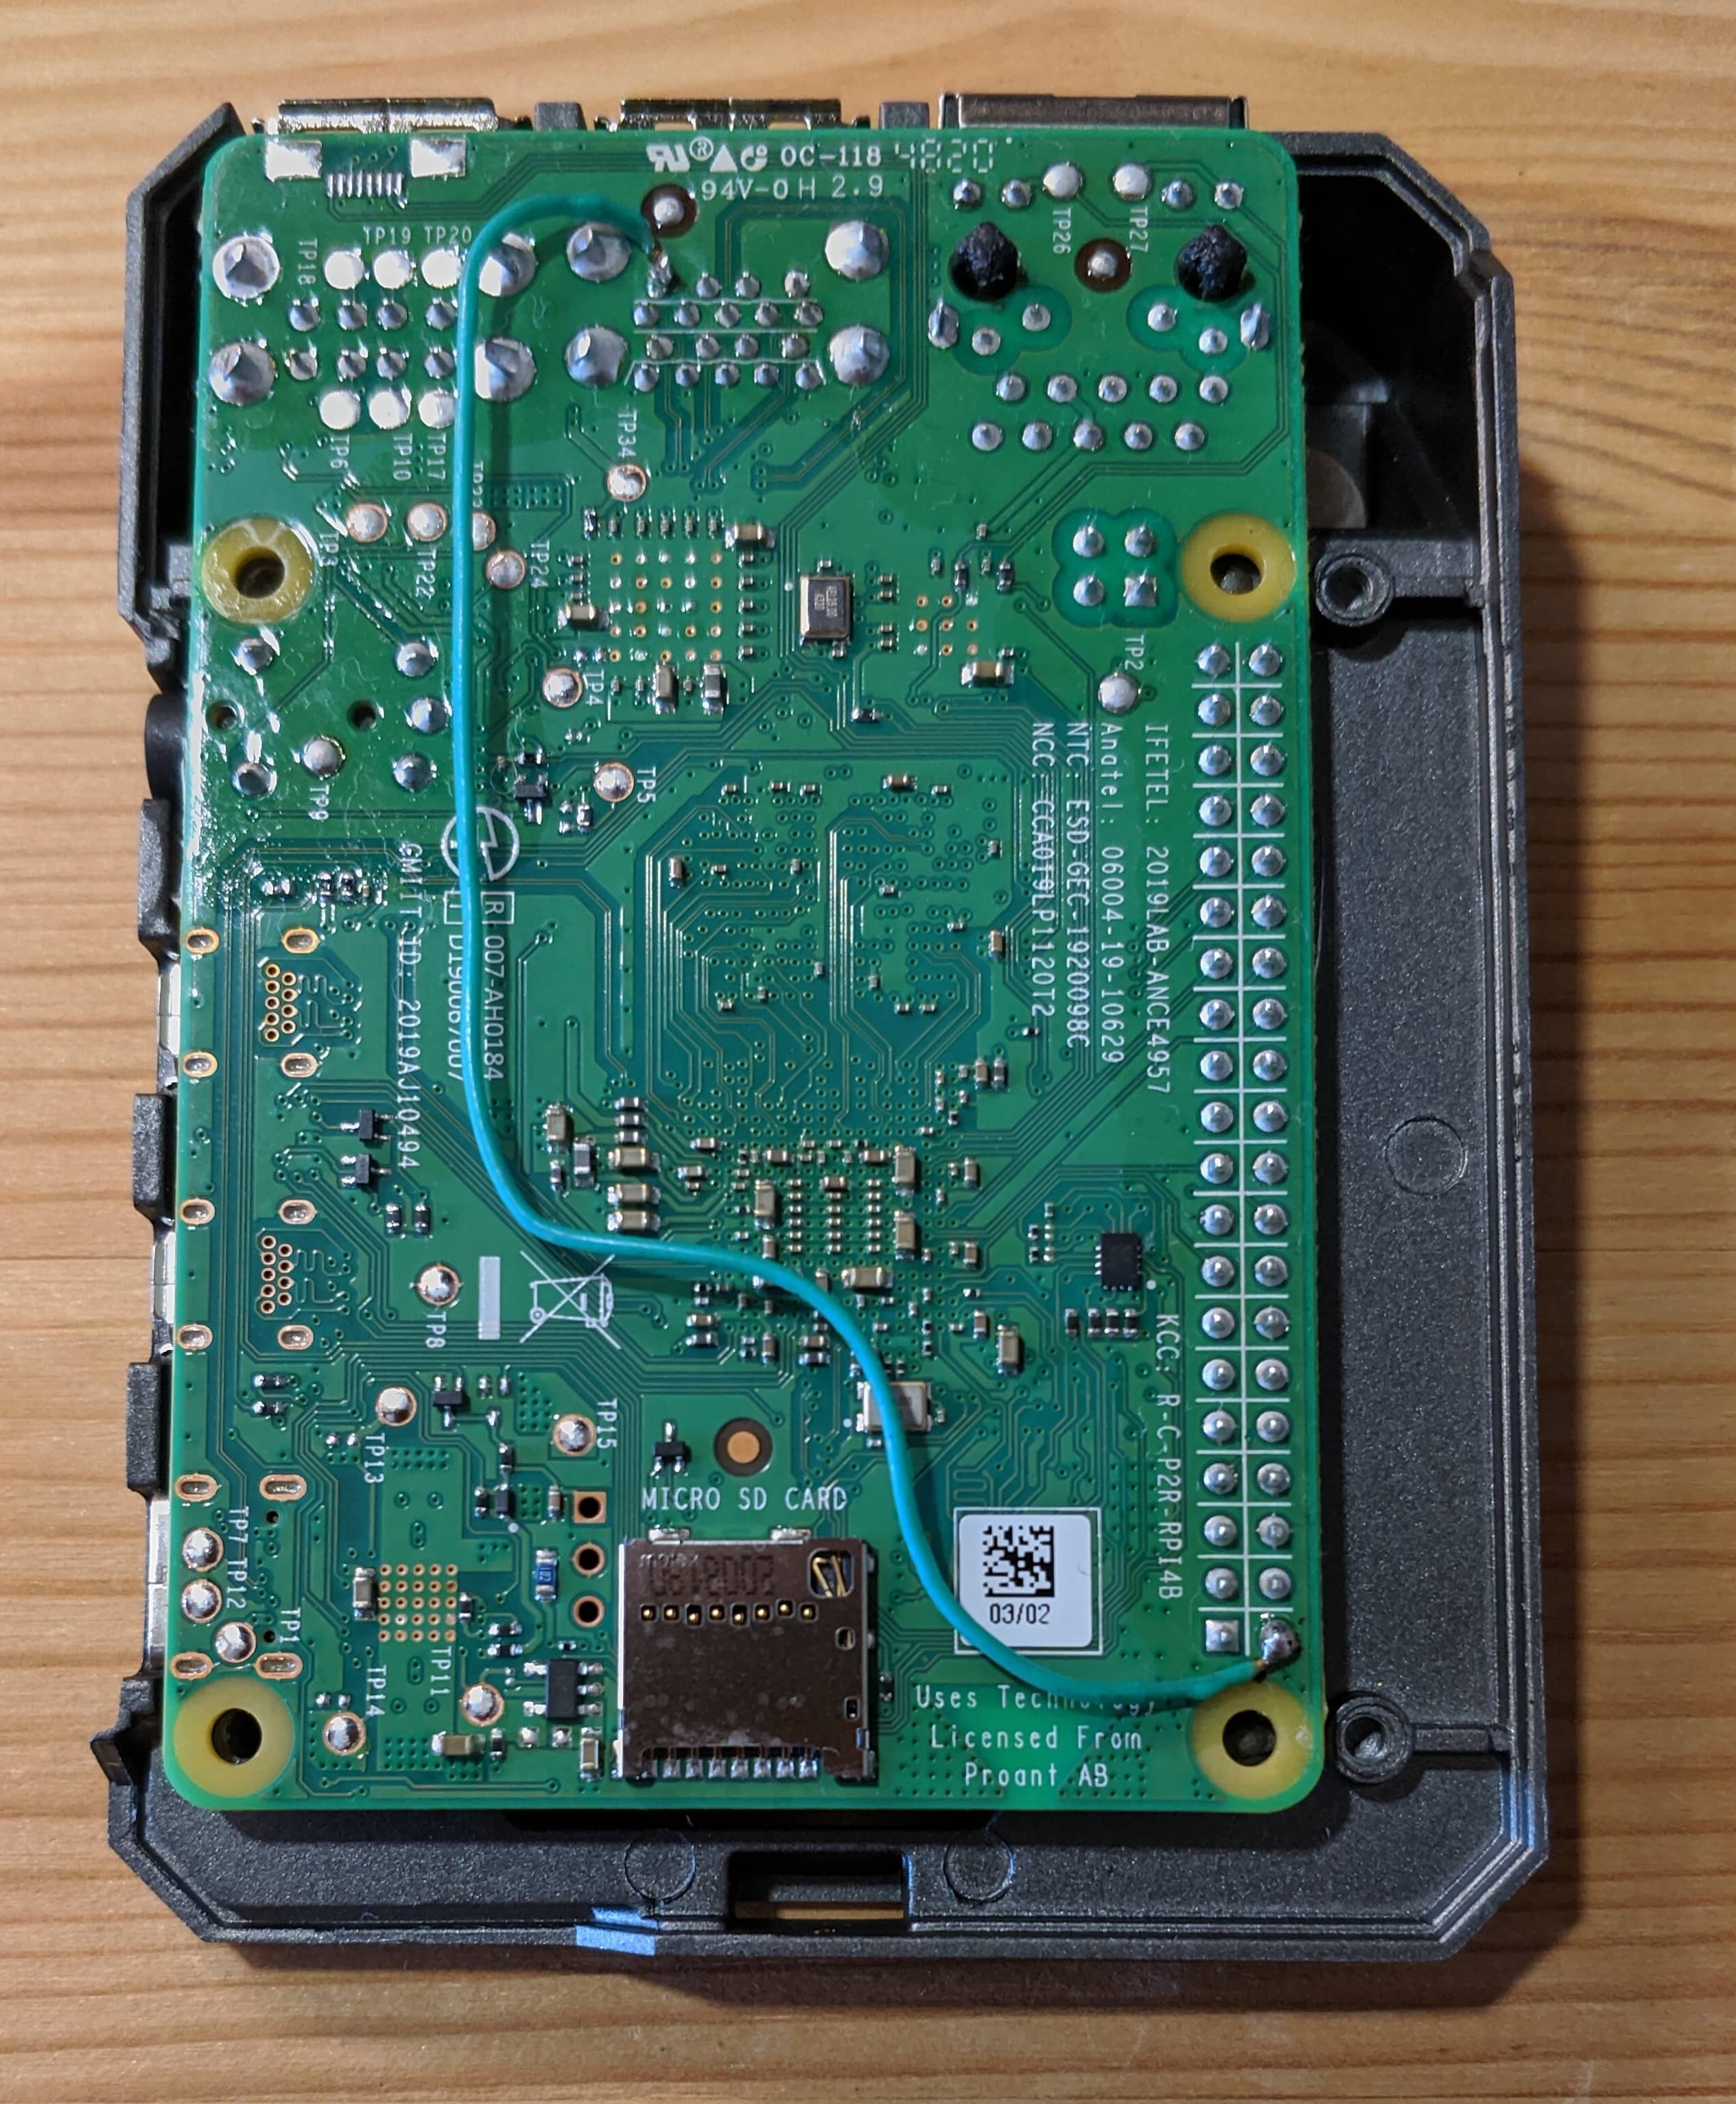
The solution to the Power problem
After googling a bit, I’ve found a a little hacky but wonderful solution to this problem:
Just solder the 5V GPIO Pin with the Ubat PIN of the USB socket, and it will be fine.
The last time I soldered was 8 years ago. So I did it like every good global corporation: I outsourced the problem.
Another tip of the googled solution was that you should connect a small capacitor to the 5V PIN and the GND Pin. Thank you again, Dmitry Grigoryev!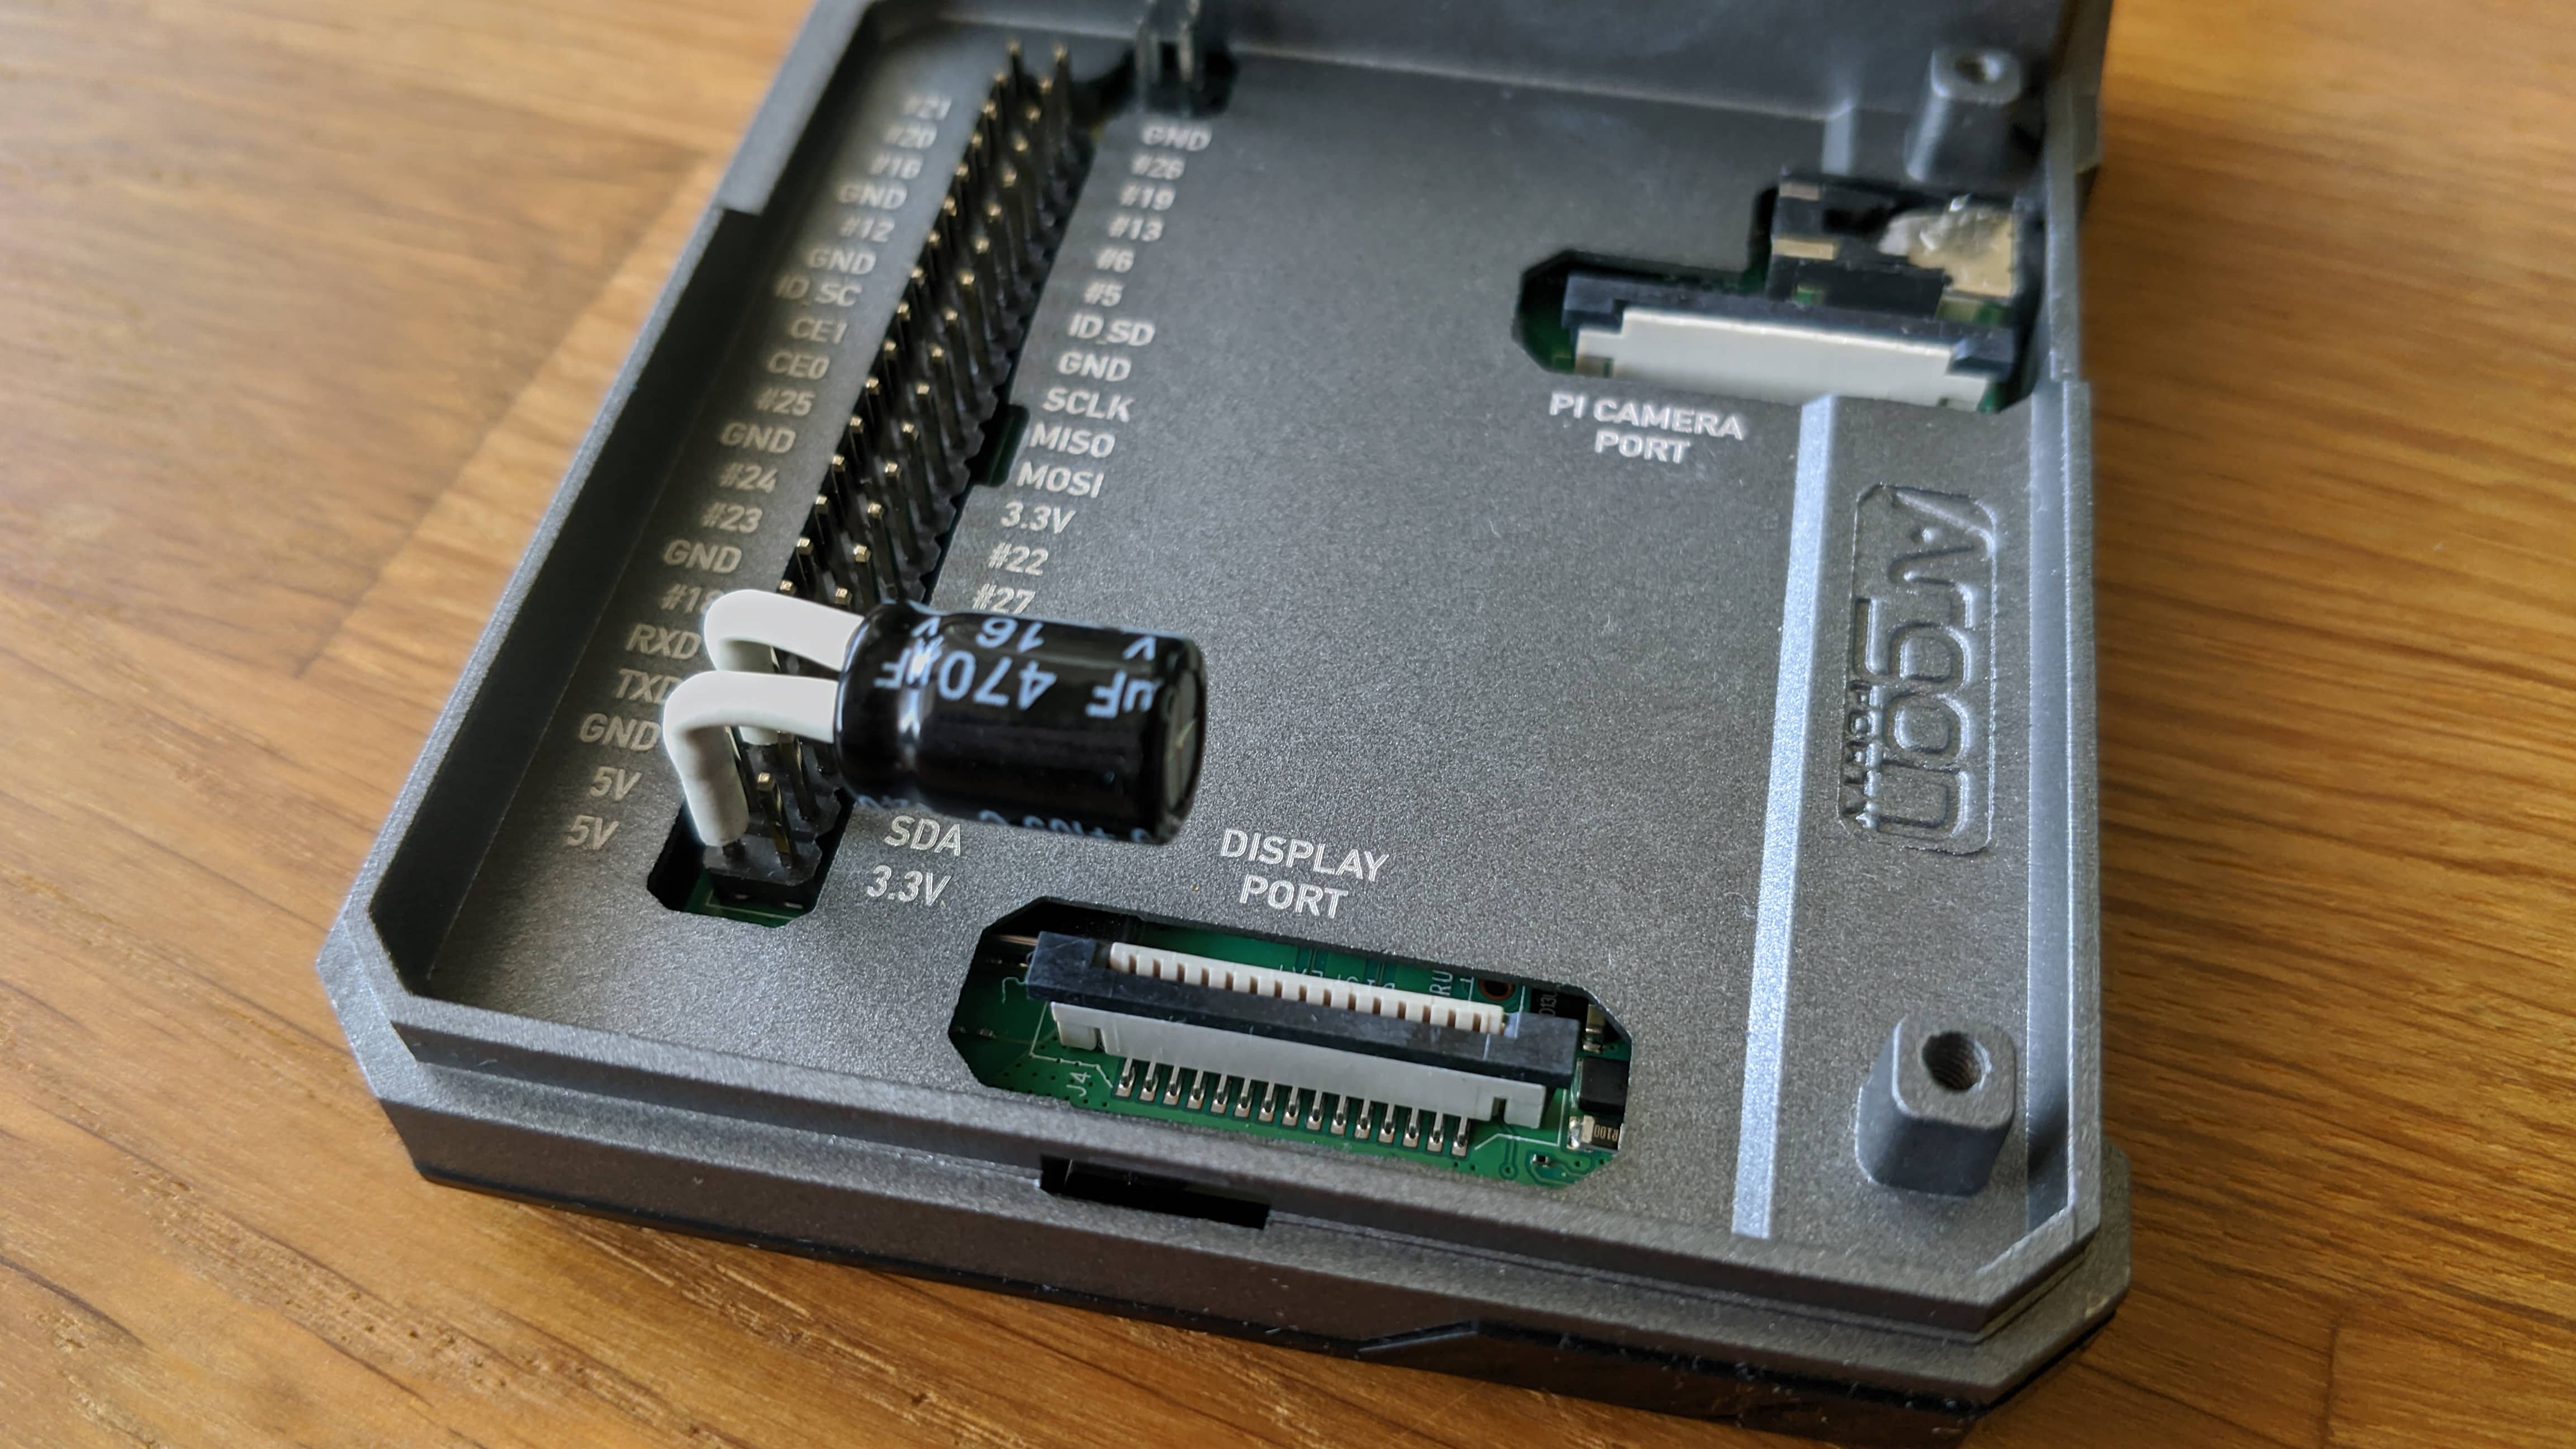
If you don’t have a Capacitor at home, become friends with an electrician and ask them for one. That’s what I did.
I got a 16V 470µF Capacitor. It works perfectly.
The solution to the NAS Problem
ZFS. It’s the solution, and it’s amazing.
As I had a lot of drive failures and SSD disconnects, I could enjoy the recovery mechanisms of ZFS multiple times.
No matter if the Raspberry Pi failed or one of the SSDs, it’s relatively easy to recover from a failed state. You can wipe the Raspberry Pi’s MicroSD and one SSD and you can still recover from that state with ZFS.
Trust me, I tested all of this (more or less voluntarily).
Quick ZFS Setup
I will not go into details. Please read another tutorial for this.
zpool create -f -o autoexpand=on -o ashift=13 tank mirror /dev/sda /dev/sdb
This willl create a ZFS pool called tank from two external disks (/dev/sdaand /dev/sdb).
The important thing of this command is the ashift value: This is the sector size which ZFS will use, it’s recommend to set it to the physical block size of your SSD.
It can’t be changed later on. If you set it too low, you will run into major performance issues.
zfs create -o compression=lz4 -o quota=600G tank/backup
The important thing about this is the compression, which you should enable. The compression saves you space and leads to a better read/write performance. Whereas the performance penalty for your Raspberry is relatively low.
Useful ZFS Commands
zpool import -a
On my first reboot after ZFS Setup, I’ve run in the problem where the Pool was not automatically imported. Removing the /tank dir and importing it again has done the trick.
parted -l
Excellent Command to see all connected and mounted drives.
zpool status -sv
This will give you a verbose status of your ZPool. Useful if you want to see if you have any Errors or if one of your SSD is too slow (-s).
zpool events
More detailed error or event messages of your ZPool.